Planning Stage
When we first started the design process for our final rocket we weren't exactly sure what we wanted it to look like. The only thing we had a design for was our fins, we knew we wanted them to be curved with pointed ends.
Building
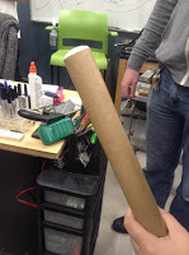
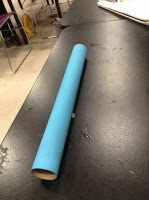
Once we got our design down we started to build our rocket. To make our our rocket body we used paper strips, a wooden stick, and wood glue. We taped the corner of of one strips to the stick, wrapped it around then taped down the other corner. For our second strip we glued it onto the first strip and wrapped it around the other direction. We continued those steps until all four of our strips were attached to one another. We waited about a one day for it dry, but once when we tried to take the paper off we realized that we used wood glue on wood. We had Andrew try to take it off and eventually we got our tube off of the stick but unfortunately our tube wasn't going to work. Thankfully Andrew gave us a tube that he had made and we were able to use that. For our nose cone we decided to just go with part of a PVC pipe.
Making Our Fins
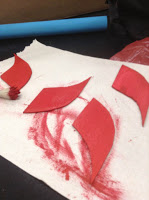
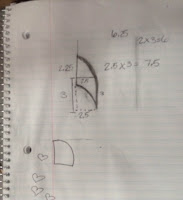
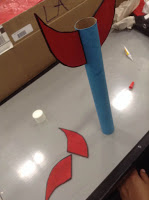
The first step in making our fins was we had to figure out how big we had to make them and we also had to find out where to place them. In order to do that we had to figure out where our center of mass was. To calculate the size of our fins we drew a picture of what our fins were going to look like then we asked Bradon for help. After doing some math we figured out that our fins were going to be around 6 inches tall and our length was going to be about 3 or 4 inches. After we calculated our fins we cut and glued them to our rocket.
Beautifying
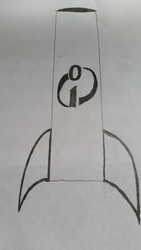
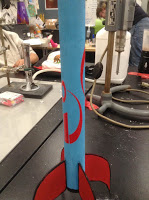
After we had our rocket body assembled we decided it was time to make it look nice. Handy and I wanted to paint our rocket blue but Nick wanted to paint it red. We compromised and said that we would paint our rocket body blue and paint our fins red. We ended up painting our rocket light blue, our nose cone red and our fins red with a black outline. We sat looking at our rocket for a while and came to the agreement it was too plain. To fix that we printed out The Incredibles logo and glued that to our rocket.

Parachute
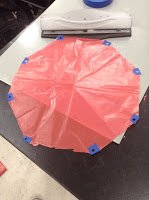
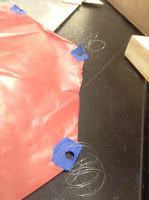
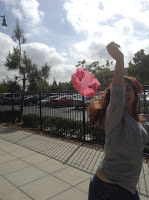
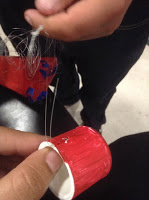
One of the last things we had to make for our rocket was a parachute so when we launched it it wouldn't be destroyed when it hit the ground. We needed to make our parachute out of nonflammable material so for that we used bio-hazard bags and cut them into an octagon. Andrew had a drawing with steps of what to do on the board and I made our parachute on my first try. We used tape to reinforce the corners that way we can hole punch them to tie strings to them that we would later tie to our nose cone and rocket. We then tied up all the strings to together and went outside to make sure it would open correctly. I ran back and forth with the parachute in my hand in order to test it. Once we knew it was good we tied it to the nose cone and to the side of the rocket.
Motor
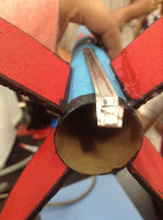
Our final step was to find a way to make sure our motor would stay inside our rocket and hurt someone. We took a piece of metal and bent it to create a bar the motor would sit on. For the motor we used rocket candy, usually we make motors in batches of 2-3 but we only needed one this time. We cut the recipe in half to get the amount of fuel we needed.
Launch Day
To launch our rockets we went to Fiesta Island. While we were waiting to launch ours Handy and I kept saying that our rocket was going to fail and it was going to be the worst out of all of them. Our motor wasn't as powerful as our peers' and we were afraid we had made our rocket too heavy. I lost sight of the rocket and wasn't able to see how far it went so in the video you can hear me say it wasn't that great. Once we went to go get it I realized that our rocket actually did really good. I was extremely surprised by how far it had gone and regretted doubting it.
